Bringing Digital Characters to Life
In this upcoming post, we’ll dive deeper into Character Creator 4, including how to set up visemes and expressions for accurate lip-sync in iClone. (Note: Version 5 now includes enhanced Blendshape features.)
AI and animation tools now make it easier than ever to create lifelike digital characters. Using AI and text-to-video technology, a simple script can be transformed into a realistic 3D avatar with realistic speech, expressions, and gestures. Reallusion’s Character Creator and iClone streamline this process with multilingual lip-sync and facial animation capabilities. The latest update to Character Creator 5 introduces enhanced Blendshape features for greater expressiveness. As these tools become more advanced and accessible, mastering them is increasingly vital for creators, educators, and businesses.
At the core of this transformation are 3D avatars digital characters that mirror human expression and speech. Realism goes beyond lip-syncing, requiring alignment of facial expressions, body language, and tone. To achieve natural performance, avatars must learn phoneme-to-viseme mapping—how speech sounds translate into mouth shapes
Phoneme is the smallest unit of sound in a given language that affects meaning within a word. Think of them as syllable , but only syllable of Sound.
Visemes are the visual mouth shapes that correspond to speech sounds (phonemes), enabling realistic lip-sync in animation.
Expressions reflect a character’s emotional state and personality through facial movement.
TIPS:
- Listen carefully to the audio to use every enunciation
- Do not overcomplicate the Mouth by adding too many shapes
- The lower lips move up, down and wide mostly. Has less complex shapes
- The Upper Lips have more complex shapes.
- Listen to the Sound, Not the letter. eg. L-E-TT-ER vs LETT-ER
NOTE 1: There are 3 Expression Sets currently supported in Character Creator: Old Set, CC4 Extended and CC4 Standard. In Character Creator 4 (CC4) AccuLips and ExpressionPlus are integrated with the CC4 Extended profile, providing the detailed blend shapes and viseme sliders needed for advanced character facial animation.
NOTE 2: In Reallusion Character Creator 4 (CC4), Humanoid characters are Non-Standard characters, while CC3/CC3+ characters are Standard characters, and they are not directly convertible.
What are Humanoid characters ( Non-Standard characters):
Humanoid characters are classified as Non-Standard and CC3, CC3+ are Standard Characters. Humanoid characters are ideal when you are importing a custom bone-skinned model into CC4 to create a character for use in iClone. Humanoid characters can’t be converted to Standard Characters in CC4.
Humanoid characters can only use a limited subset of the features of CC and iClone. They cannot use: eg. Cc Cloths, transfer skin weights, Skingen, cc morphs, Acculips, cc4 Extended Facial profile..etc
CC3+ Characters (Non-Standard characters):
These are the standard characters in Reallusion’s ecosystem, built with the full standard skeleton and facial features. They are the default for Reallusion’s workflow, suitable for creating characters using their character-building tools. You can use features like the Create > Accessory option and clothing conform to add and modify clothes. The standard workflow allows for weight painting and transferring skin weights from one mesh to another, which is crucial for character animation.
The Process:
In Character Creator 4 (CC4), you use the Facial Profile Editor to define visemes, which are mouth shapes then used by iClone for lip-sync animation. This step is essential for all non-Reallusion models to ensure accurate speech synchronization. If you’ve imported a custom model, make sure to characterize it as a Humanoid first.
CC4 offers two systems for customizing expressions:
8+7 Phoneme Pair – Uses 8 lip shapes and 7 tongue movements to automatically generate 15 visemes. This is the default for all CC characters.
1:1 Direct – Lets you manually edit each of the 15 visemes by mapping sliders directly to morphs or bone positions.
You can switch between these systems under the Viseme node in the Facial Profile Editor. By default, all CC characters are supported with Phoneme Pair combining 8 lip shapes and 7 tongue shapes.

Creating Custom Expressions:
In CC4 customizing and optimizing a character’s facial expression happens in the Facial Profile editor(F8) panel. You can open this from Windows menu or Modify/ Motion Pose Panel
1. Click on Facial Profile editor/ Edit Expression
2. In the left panel of the Facial Profile Editor select the Viseme node. The right-side pane will display a list of viseme sliders.
3. Click the toggle button to switch between 8+7 Phoneme Pair and 1:1 Direct systems. The sliders will change depending on which system you choose.
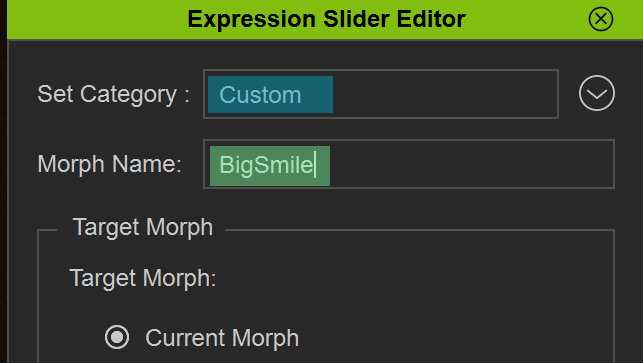
4. Adjust sliders until you are ready to save the changes as a NEW Expression.
5. To save the new changes as new Expression, click Custom → New Slider, name it (optional), and save your custom expression.
6. You can further tweak all the existing or custom expressions you have created in Facial Profile Editor.
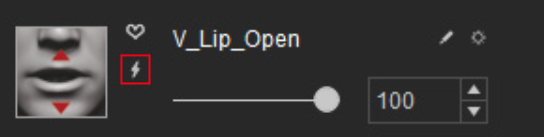
7. Go to Modify → Motion Pose → Edit Facial to fine-tune your custom or existing expressions. Adjust mouth shapes using bone-based, morph-based, or hybrid methods. (More Details to follow on these later)
8. This is important. – After making the changes (e.g., V_Lip_Open), you must click the Quick Update icon to save changes.
Modify → Motion Pose → ‘Edit Facial’
IMPORTANT
“Edit Facial” Custom Expression:
In order to save the facial expressions created with “Edit Facial” tool in Facial Profile editor you must change this settings.
Preference / Facial Profile Editor/ Select ‘Keep Origin Pose ( except Viseme)’.
Now you can use “Edit Facial” to get the character to look however you want, then switch over to Facial Profile Editor and add a “New Slider” which will capture the current expression.”
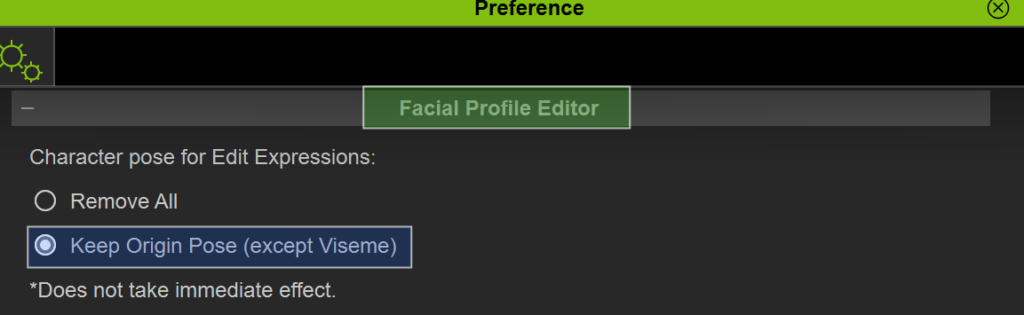
NOTE: Always click ‘Reset to Zero’ after saving your changes in ‘Edit Facial’ to ensure a clean slate before creating a new expression.

The Edit Facial panel has three modes for adding new facial expressions: Modify, Expression, and Muscle.
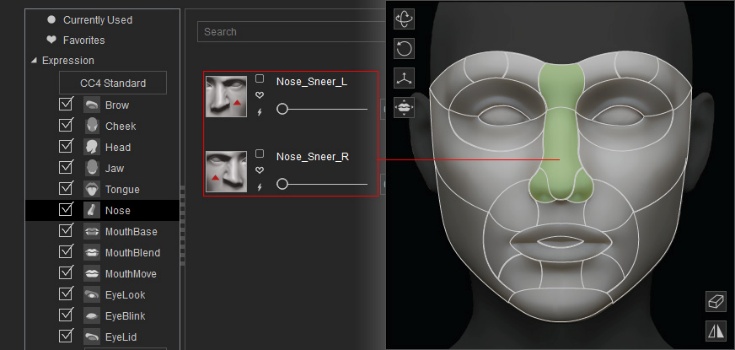
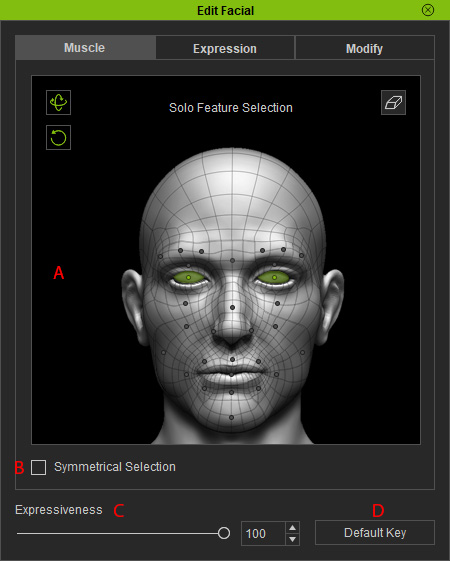 Muscle: The facial muscles are used to control the Eyes brows, cheeks, Nose, Tongue and Eyelids You can create facial expressions by directly dragging specific facial features. Click and drag selected muscle region, use the Symmetrical Selection checkbox to edit both sides simultaneously to adjust the facial features. The character will show the adjustment in realtime. Click on thunderbolt icon to save changes.
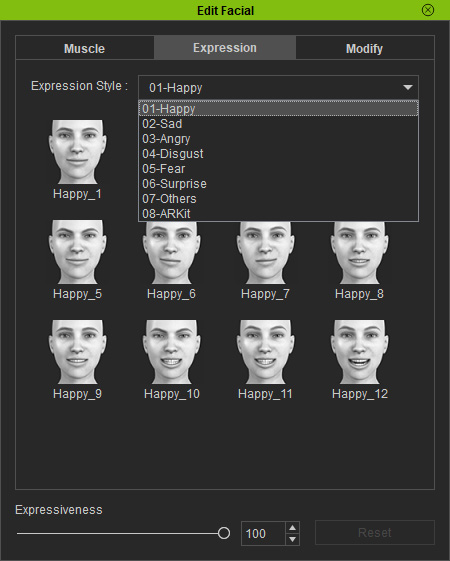
 Expression: There are various templates for facial expression keys in the Expression mode. Choose the desired expression style from the Expression Style dropdown list and click on a preset to apply it instantly.
Expressiveness: The influence strength for applying templates is determined by this slider.
Click on thunderbolt icon to save changes.
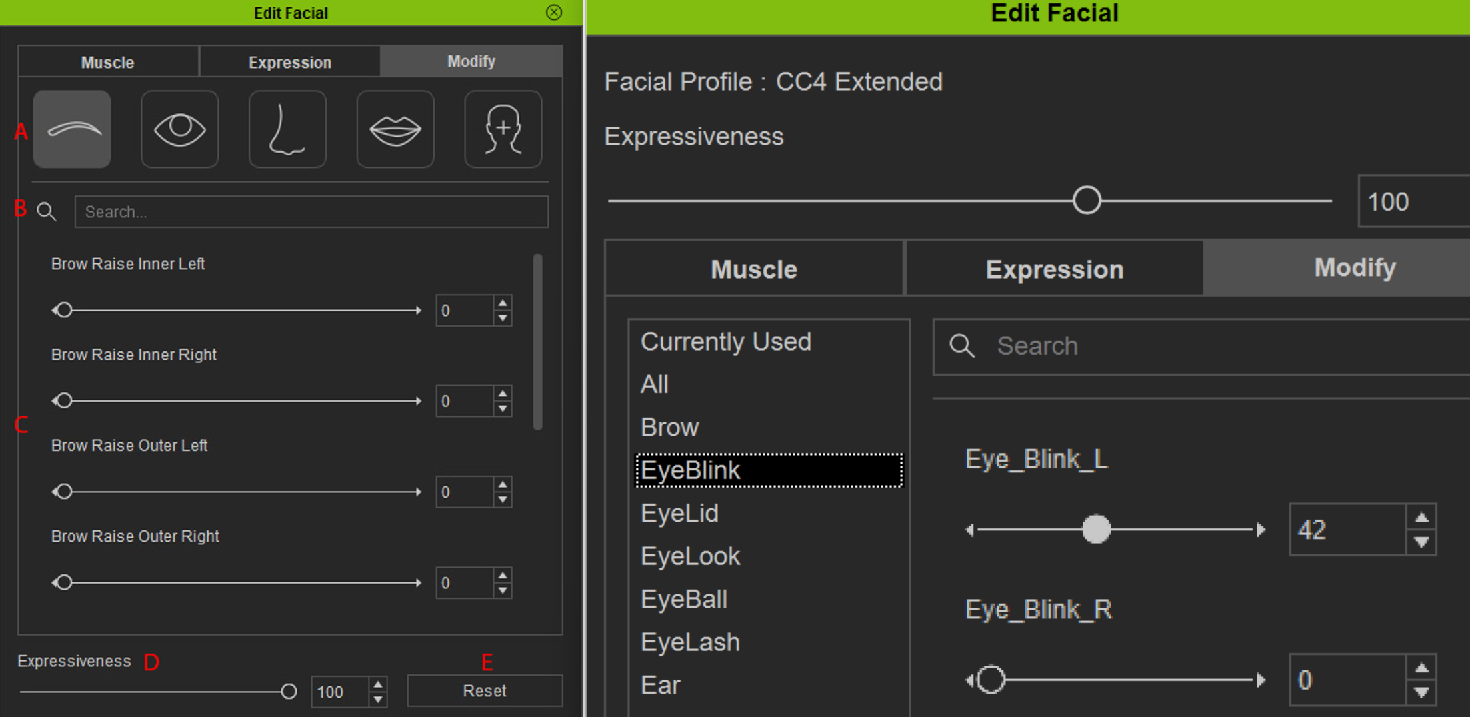
 Modify: Morph sliders allow you to adjust the facial expressions in the Modify Mode.
To fine-tune, select the desired facial features (enter the slider names to filter the sliders).
To modify the selected facial features, drag the sliders.The character will instantly assume the facial expressions.
Click on thunderbolt icon to save changes.
HOW TO MODIFY, ADJUST AND MAKE CUSTOM CHANGES TO AN EXPRESSION FROM FACIAL PROFILE EDITOR
Generally speaking, there are three methods for producing 3D character’s facial expressions: Bone-based, Morph-based and Hybrid-based(bone and morph).
In the Facial Profile Editor panel, you are free to use the tools to adjust bones, mesh or both to set the facial expressions and lip-syncs sliders.
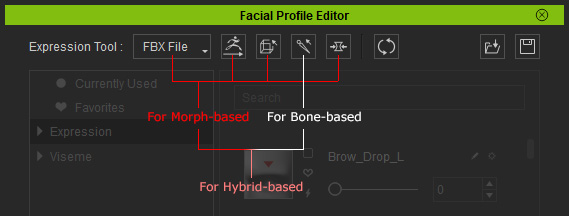
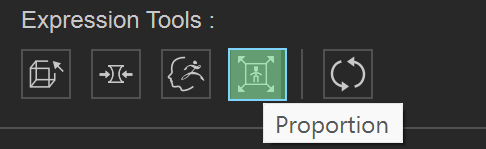
For Bone Based: Click the Proportion button at the top of the panel.
Pick the bone that may be related to the lip-sync around the mouth ,Move and rotate the bone to the desired limit direction in one axis.
Morphed Based: CC4’s built-in Morph Expressions sliders lets you adjust and fine tune morphs for height, angle, and other parameters to create more dynamic expressions
Edit Mesh-Based– Click the Edit Mesh. The Modify panel will enter the Edit Mesh Mode. You can use the vertex, Face or sculpt mode change the expressions.

How to Export a CC4 Character for iClone Export:
To prepare a Character Creator 4 (CC4) character for AccuLips and body animation in iClone, you must apply the correct facial profile, ensure the body is compatible with iClone’s animation system, and send the character over via the “Send Character to iClone” command.
If you are using a custom character or head, you may need to adjust the viseme shapes to achieve better lip-sync results. In the Facial Profile Editor/ Expression Set or Viseme Set section – Adjust the corresponding morph sliders to refine the mouth shapes for each viseme (e.g., ‘m’, ‘p’, ‘b’ sounds).
Few ways to Export Character from CC4 to iClone:
1. Click the Send Character to iClone button on the Project toolbar in CC4
2. Export as iAvatar. “File > Export > iAvatar”
You can then drag and drop this iAvatar file directly into your iClone scene.
3. Export the character as an FBX file via the “File > Export > Cloth Character FBX” menu option. This method is ideal for using your character in external 3D applications or game engines.